
Transforming a van into a comfortable, functional living space can seem like a daunting task. However, with the right guidance and tools, you can turn your van into the camper of your dreams. Nevan’s custom furniture kits are designed to simplify the process, making it accessible even for those with minimal DIY experience. In this ultimate guide, we’ll walk you through the steps of a DIY camper van conversion, highlighting how Nevan’s solutions can help you achieve the perfect setup.
Step 1: Planning and Preparation
Assess Your Needs
Before you begin, it’s essential to plan your conversion carefully. Consider the following:
- Travel Companions: How many people will be using the van? Do you need space for pets?
- Activities: What activities will you be doing inside the van (e.g., cooking, sleeping, working)?
- Storage: How much storage do you need for clothes, gear, and essentials?
Research and Inspiration
Look for inspiration from other van conversions. Websites, social media, and van life communities can provide valuable insights and ideas.
Set a Budget
Determine how much you’re willing to spend on your conversion. Nevan’s kits offer great value for money, combining quality with affordability.
Step 2: Choosing the Right Van
Selecting Your Van
The type of van you choose will significantly impact your conversion. Consider factors such as:
- Size: Ensure it has enough space for your planned layout.
- Condition: A well-maintained van will save you from costly repairs.
- Fuel Efficiency: Opt for a van that offers good mileage to save on travel costs.
Step 3: Designing Your Layout
Space Optimization
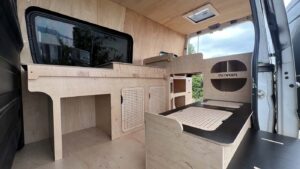
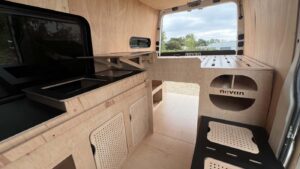
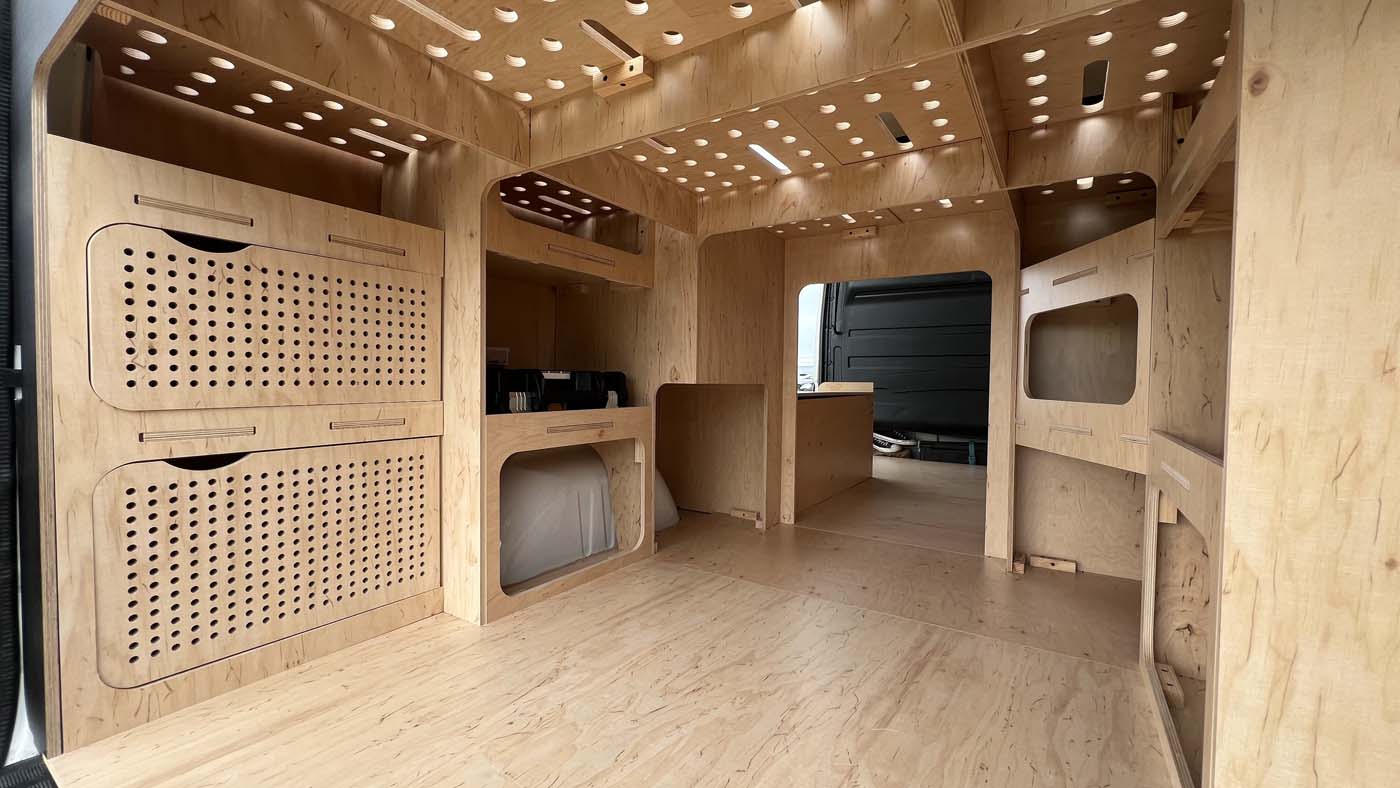
Maximizing space is crucial in a camper van. Nevan’s custom furniture kits are designed to fit perfectly in various van models, ensuring you make the most of every inch.
Key Components
- Bed: Decide between a fixed bed or a convertible sofa bed. Nevan’s kits offer both options, providing flexibility based on your needs.
- Kitchen: Incorporate a compact yet functional kitchen. Van kit include sinks, countertops, and storage solutions that make cooking on the road a breeze.
- Storage: Utilize overhead cabinets, under-bed storage, and pull-out drawers. Nevan’s kits are equipped with innovative storage solutions to keep your belongings organized.
Step 4: Insulating and Flooring
Insulation
Proper insulation is crucial for maintaining a comfortable temperature inside your van. Use materials like foam board, sheep wool, or Thinsulate. Insulate the walls, floor, and ceiling to keep your van warm in the winter and cool in the summer.
Flooring
Install durable and easy-to-clean flooring. Vinyl or laminate flooring is a popular choice due to its resilience and low maintenance.
Step 5: Electrical and Plumbing Systems
Electrical System
Setting up an electrical system can be complex, but Nevan’s kits simplify the process. Here’s what you’ll need:
- Batteries: Deep cycle batteries to store energy.
- Solar Panels: For off-grid power.
- Inverter: To convert DC power to AC power.
- Wiring: Follow a wiring diagram to connect your devices.
Plumbing System
A basic plumbing system includes:
- Fresh Water Tank: For drinking and cooking water.
- Grey Water Tank: For wastewater from the sink.
- Pump and Faucet: To provide running water.
Step 6: Installing Nevan’s Custom Furniture Kits
Easy Installation
Nevan’s kits are designed for easy installation, even for beginners. Each piece is labeled and corresponds to detailed instructions, ensuring a smooth assembly process.
Bed and Sleeping Arrangements
Nevan’s beds are comfortable and easy to assemble. Whether you choose a fixed bed or a convertible option, you’ll enjoy a good night’s sleep.
Kitchen Setup
Nevan’s kitchen kits include everything you need to cook on the road. The ergonomic design ensures you can cook comfortably, whether sitting or standing.
Storage Solutions
With Nevan’s innovative storage solutions, you can keep your van organized and clutter-free. Utilize overhead cabinets, under-bed storage, and pull-out drawers to store all your essentials.
Step 7: Personalizing Your Space
Decor and Accessories
Make your van feel like home with personal touches. Add throw pillows, rugs, wall art, and curtains that reflect your style.
Lighting
Good lighting can transform the ambiance of your van. Install LED strips, fairy lights, or portable lamps to create a cozy atmosphere.
Comfort Items
Invest in quality bedding, comfortable seating, and ergonomic cushions to enhance your comfort on the road.
Step 8: Final Touches and Maintenance
Regular Cleaning
Keep your van clean and free of clutter. Regularly wipe down surfaces, vacuum the floors, and clean windows to maintain hygiene.
Check for Wear and Tear
Periodically inspect your furniture and fixtures for any signs of wear and tear. Tighten screws, check for damage, and make necessary repairs to keep everything in good working condition.
Seasonal Adjustments
Make adjustments to your setup based on the season. Swap out lightweight bedding for warmer options in winter, or install sunshades and fans for better ventilation in summer.
Conclusion
Converting a van into a camper is a rewarding project that allows you to create a home on wheels tailored to your needs. With careful planning, the right tools, and Nevan’s custom furniture kits, you can achieve a professional-quality conversion even if you’re new to DIY. By following these steps, you’ll be well on your way to enjoying the freedom and adventure of van life.
Van conversion kits simplify the process, offering high-quality, easy-to-install solutions that make van conversions accessible to everyone. Whether you’re a weekend warrior or a full-time van lifer, our kits are designed to provide comfort, functionality, and style.
Ready to start your DIY van conversion? Visit Nevan’s website today to explore our range of custom furniture kits and begin your journey to creating the camper van of your dreams.