
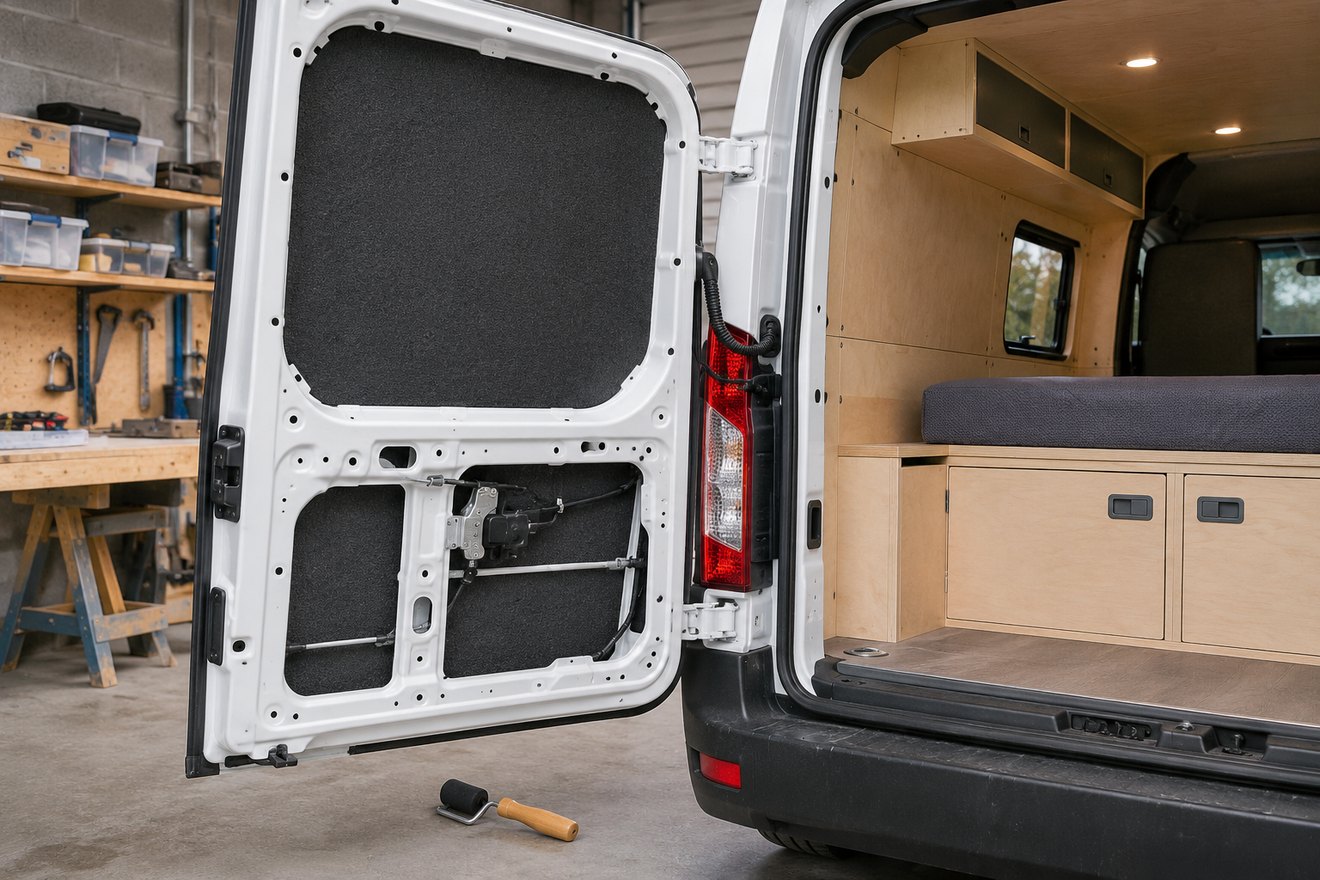
Insulating van doors means working around parts that move and drain every time the doors open. The goal is a warmer inner trim panel that still comes off when a latch or cable needs attention. Start with one door stripped just far enough to see the original arrangement.
Map the latch, drains and clips
Photograph the cable runs, latch rods, door drains and factory membranes. Mark the areas used by moving parts through their full travel. Leave the drain path and any intended moisture shield functional. Work from the vehicle manufacturer’s body or trim guidance, especially on cab doors with speakers, windows or safety equipment.
Fit the insulation within the trim depth
Make a template from card and press the inner trim back into place with the template behind it. Rear door skins and mechanisms can leave much less space than the largest visible recess suggests. Choose automotive-compatible materials and adhesives and keep them clear of lock movement and clip holes. Keep the original service access usable and note any fasteners that need a specific refitting method.
Check one finished door before copying it
Open and close the door from both sides, operate the lock and inspect the lower drains. If the trim bows or the latch feels different, reopen the panel to find the obstruction. Compare the other door separately before cutting a second piece. The two rear doors often have different latch linkages and service openings even when the trim looks symmetrical.
FAQ
Can I fill the entire cavity with loose insulation?
Leave the original drainage and moving parts clear and avoid materials that can shift into them. Keep access for future inspection.
Can the same approach work on a sliding door?
The planning steps carry across. Check its latch, roller, wiring and trim clearances using the specific vehicle guidance.
Read our guide to planning campervan wall lining for the next part of the build. You can also send your layout and measurements to NEVAN.